Shed Kit full fitting instructions
First, you choose the location. A heat resistant base is placed on the floor (the hearth). Hearths should be a minimum of 12mm thick (or 125mm thick with some stoves) - please see a stove's product page.
If you are following building regulations, the hearth must be a minimum size of 84cm x 84cm square (one large slab or a jigsaw of smaller pieces). That can seem overkill in a small room but if choosing to go smaller then make sure there is a minimum 30cm of hearth in front of the stove door (if a stove asks for more then follow what it says but more than 30cm very rare). The 84x84 is building regs size for inside a habitable room. Non habitable rooms (e.g. sheds) it is up to you but we recommend 6" around the stove minimum and 30cm in front of the stove to catch any embers that may drop out the door (also the floor in front of the stove can get very hot).
It is best to bed your hearth down on a thin sand/cement mix. You can though just lie the slab straight down on the floor (more chance of a slab cracking without the sand/cement mix though - but unlikely unless undulating surface under flat slab).
If choosing slate or granite go for 2.5cm or 3cm thick for strength so it does not crack under the weight of the stove. Visit your local builder's merchants "outdoor yard" lots of slabs and slates and tiles to choose from (some very cheap but can look really great - shabby chic and all that).
Next, heat shields are placed on any combustible wall/s near the stove to protect the wall/s from getting too hot. Follow the distance to combustibles link for more... It is the air gap that protects the building and not the shield. Quick read of this subject matter is further down this page. Stoves, Vitreous Pipe and Twin Wall pipe all have different distance to combustibles requirements.
Place the stove in situ.
A hole is made in the roof (or wall) for the flue pipe. In the wall or sloping roof this will be an eclipse (egg shape) but a flat ceiling it is a round hole. Leave an air gap of a minimum 5cm all around the flue pipe (7cm if boxed in e.g. when passing through a void). Hole size should be diameter of pipe plus 50mm air gap all round for safety (70mm all round if pipe boxed in and not open to the air). So that's 100mm extra on the diameter, or 140mm extra on the diameter.
5" twin wall has an outer diameter of 192mm and 6" has a diameter of 217mm. You can leave any void as just an air gap or fill any wall or ceiling void/air gap with Rockwool afterwards. Use Rockwool as it is A1 fire-rated (will not catch fire).
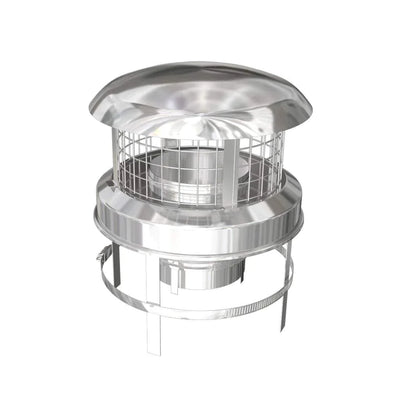
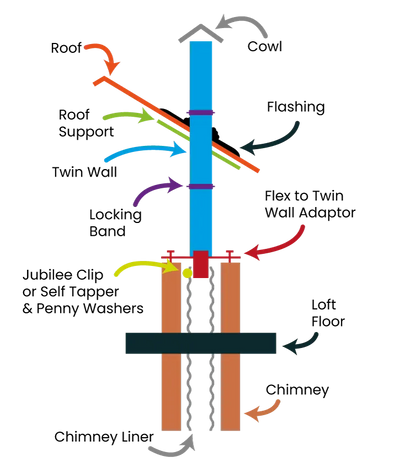
To work out which way up your flue pipes go (which is the top and which is the bottom?) attach the cowl to one of your lengths (cowl is the witch's hat that stops rain entering the chimney). The cowl will only fit to one end and once done you know which is the top of a length of pipe (it is the end that happily fits to the cowl!).
Twin wall parts connect to each other using narrow locking bands. That is it. No sealant or glue of any kind required. No sealant or glue is required anywhere on this install.
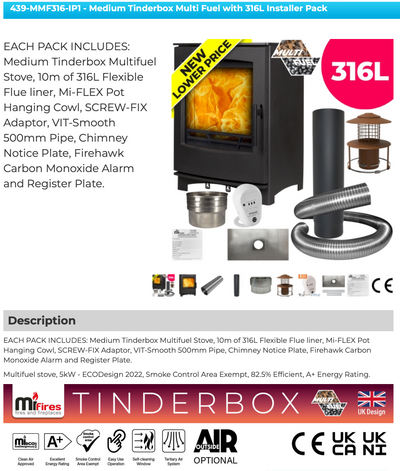
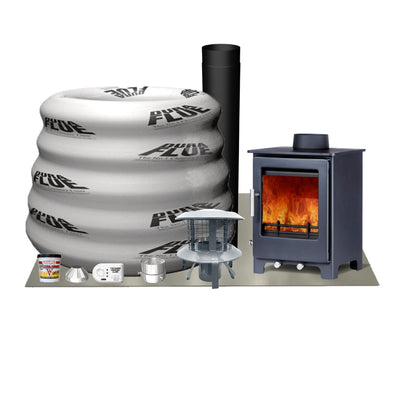
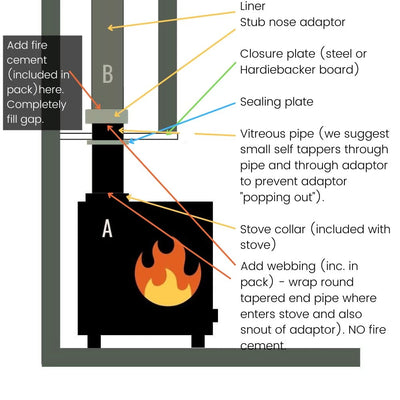
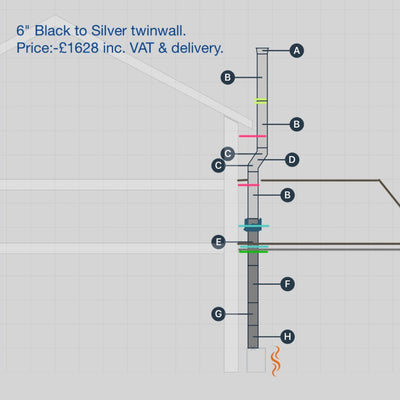
The first part into the stove is the "stove to twin wall adaptor" - that is the part above the cowl in the picture of all the parts). This adaptor is usually 4" to 5" or 5" to 5" or 5" to 6" or 6" to 6" (if the snout does not fit INTO the stove hole then you have the wrong size). It can insert into a stove or into vitreous pipe and acts as the 'transition' to twin wall "clip-together" chimney parts. You might wish to have a play and clip your adaptor to the first length of twin wall "clip-together" pipe with one of the supplied narrow locking bands (choose a 500mm length or a 1000mm length up to you - we supply both so you can juggle around to avoid having a joint hidden in a ceiling void which is not good practice).
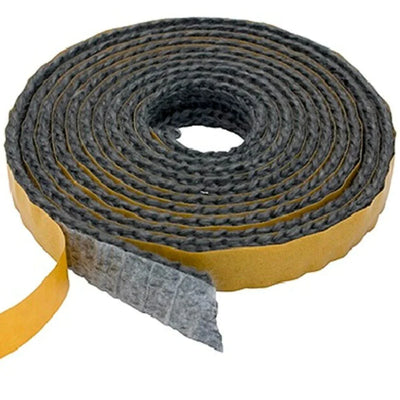
The adaptor is a loose fit in the stove (they always are) "like a pencil in a bucket" (exaggeration). The adaptor has a "snout" that goes inside the hole on top of your stove. The snout can be cut down if too long using a grinder and 1mm thick metal cutting disk (wear goggles and gloves). You can smear Fire Cement around the snout to seal the gap if you wish (the old way). This is water soluble so you can wipe away any excess using a damp cloth. It will not harden until many hours have gone by or the stove is lit. But fire cement dries a horrible light grey colour and cracks and falls out the gap over time. We recommend wrapping fireproof webbing (supplied) around the snout (one layer should be enough but double-layer if required) and sliding the snout into the stove. Do not over-worry how airtight this is - imagine an open fire in your local pub: a great gaping hole open to the room . Chimneys suck from the top: smoke does not escape through gaps unless the chimney is blocked or a sudden downdraft and if that happens the smoke would pour out the air vents of your stove! You can drill a hole the size of a 50p in your flue pipe and it will suck air into the flue and not the other way around.
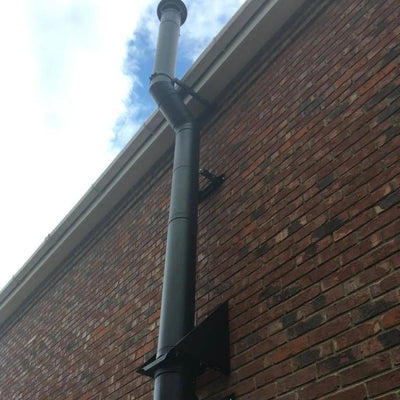
Fit your flashing. This is, by default, an EDPM Eaziseal flashing: screws to a roof using wood screws (if roof is made if wood) or metal roofing screws (if roof is made of metal). You will drill pilot holes in the EDPM flange to take the screws. With the Ezi-seal flashing no glue/silicon/sealant is required.
If you have roof tiles then you will likely have chosen an "Aluminium Rubber Flashing" or lead aluminium flashing. Installation of this flashing involves removing tiles, fitting the flashing and then replacing the tiles. Best bet here is Google the subject. With both flashings you will have to cut your required hole size in the black rubber "nungy" (a word from schooldays I think... hope it's not rude).
Hide the hole inside the building with a finishing plate (not supplied) or make your own out of Hardiebacker board from all good building merchants. A few dots of silicon will stick this to the wall or ceiling.
If passing through a wall it is the same with the outside of the building (if outside is not completely flat you may have to create a flat area using Hardiebacker board or similar. There is no "defined method" for outside as so many different surfaces.
If your chimney has more than 1.8m unsupported flue then add a Wide Locking Band to the lowest unsupported joint (in addition to narrow locking band and it goes over it so two locking bands on one joint).
Fit your bracket/brackets.
Fit a Carbon Monoxide Detector.
You should have a small bag with the fireproof webbing. If not we messed up and forgot to send it - arrives in the post.
Any questions Julian is usually on Live Chat (hours at top of website). Or you will get Julian's right hand man... Henry.
Easy peasy! Okay there's a few things to think about - but it is not rocket science.

